'Out of the box', GenoPro's
Display menu allows to add full date of birth and full date of death to the top label area of each Individual
OR for example add the occupation/profession, but not
BOTH at the same time.
However one of my GenoPro 'Report Skin Templates', namely
{EN} XML Toolkit, can be used to manipulate the data in your .gno file (which is actually a zipped XML file) to create a
multiline 'Custom Tag' that can be used for a the top label text and consists of up to 5 lines of information. Running this report produces a modified XML version of your .gno file that can be opened with GenoPro to show this information and can then be exported as a .emf file. So for example you can have a line with data and place of birth, a line with date and place of death and another line with last Occupation/Profession.
But you would like to add further information. Fortunately the
{EN} XML Toolkit can be customised to allow for this by editing a configuration file.
The width of the lines in the top label is limited and so and text needs to be abridged. I suggest creating two additional Custom Tags for
Individuals called Precis1 and Precis2 using the GenoPro menu
Tools / Tag Editor e.g.
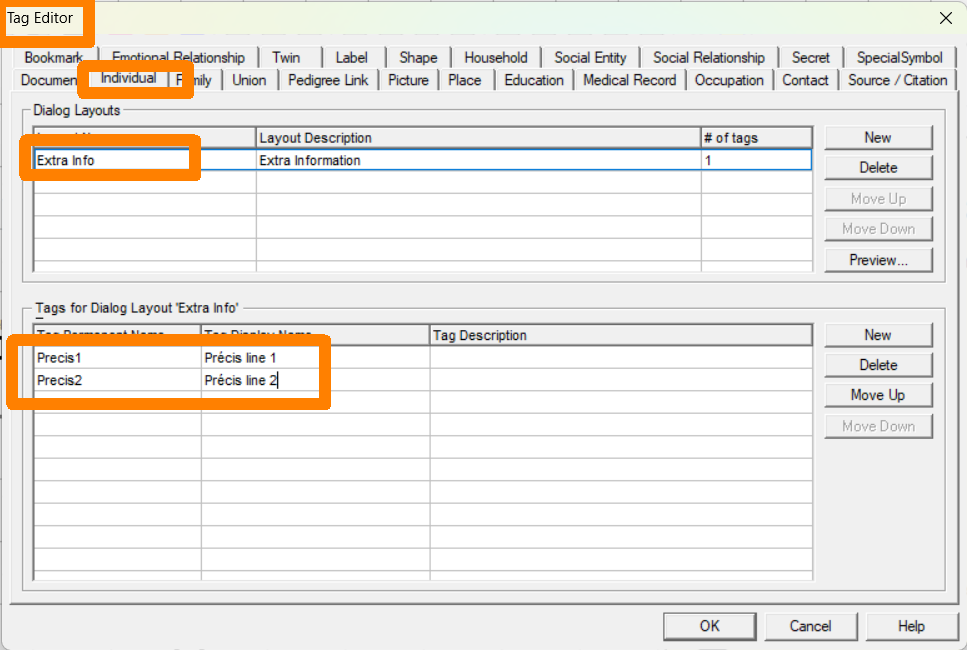
Then using the Properties dialog 'Extra Info' tag you can populate these fields with your data for all Individuals as required.
Next we need to customise the
{EN} XML Toolkit report.
First ensure you have downloaded and unzipped the latest Report Skin Templates from
Updates to Report Skin Templates since GenoPro 2020 version 3.1.0.1 following the instructions to install in a 'Report Skins' folder of your choice.
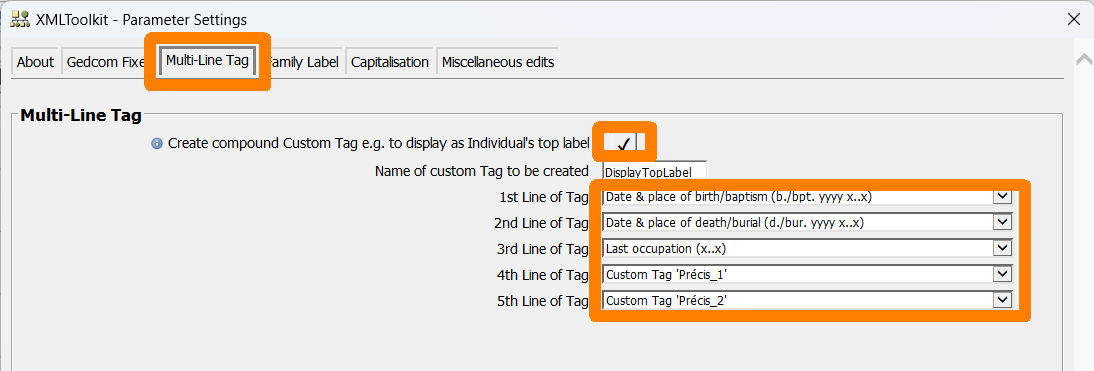
Then download the attached configuration file ConfigMsgBase.xml into the folder <report skins>\Common\Code\XMLToolkit folder replacing the existing file. (where <report skins> is the folder you chose to install the report skins into. This file will add the option of selecteing the above Custom Tags Precis1 & Precis2 as lines in the top label.
You can then run the
{EN} XML Toolkit report. Select the Options tab of the Generate Report dialog and set the Skin Folder to the path for <report skins> above.If you then lick the Generate button you can set the report options i.e.
If you then execute the report and open the resultant .xml file in Genopro you will see the changes in the top lable of Individuals e.g.
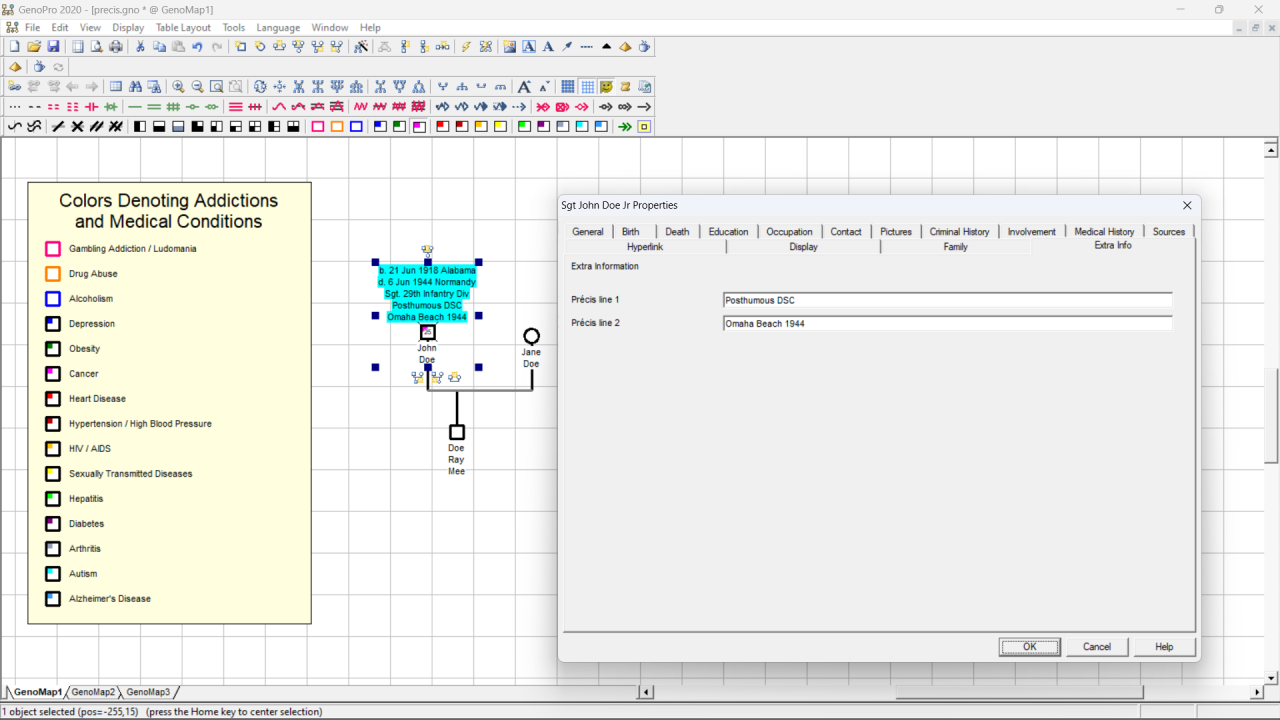
I have also shown here that you can use colour coding of gender symbols to show medical conditions and also add a legend to describe this colour coding. The legend is made up of standard GenoPro drawing objects and can of course be edited to reflect your particular requirements e.g. remove addition symbols from the legends.